Introduction
React Native is constantly improved by both its dedicated provider and the vibrant community surrounding it, making the regular updates of existing apps to the newest version a crucial task for developers. These regular React Native version upgrades are required as they bring forth new, innovative features but also essential security fixes, directly influencing the efficiency and safety of your applications.
In this article, we emphasize the necessity of keeping pace with the latest advancements in React Native. More importantly, we will guide you, step by step, through the process of upgrading your application, ensuring you can confidently implement these crucial updates for optimal app performance.
Why Should I Upgrade React Native?
You may be wondering – why should I upgrade React Native? And so, before going into the specifics of how to do this, it’s important to understand why keeping your React Native apps up to date is essential. Here are some key reasons:
1. Security
Outdated dependencies can introduce security vulnerabilities.
2. Improved Stability
Older versions of React Native may be more prone to bugs and crashes. By staying up to date with the latest releases, you can benefit from bug fixes and stability improvements, ensuring that your mobile application provides a reliable experience to users.
3. Easier Debugging
Newer versions of React Native often come with much better debugging tools and error-reporting mechanisms. These tools make it easier for developers to identify and resolve issues, reducing the time and effort required for troubleshooting.
I remember when Flipper was introduced to React Native in version 0.62. This change significantly shortened the time it took to identify the causes of reported bugs. Now, we have even better debugging tools. In Expo SDK 49, a debugger was added, accessible from within VS Code, which, in my opinion, is incredible and demonstrates the value of staying up to date.
Kornel Kwiatkowski, React Native Developer
4. Performance Improvements
A new release of React Native often includes performance boosts, making your application run faster and smoother. By updating the version, you can ensure your digital product remains competitive in terms of speed and responsiveness.
Our client had been postponing the update of their React Native version for over 2 years. Finally, they decided it was time to make some updates, and we upgraded their application by a substantial 8 versions. The impact on performance was truly remarkable. Their app ran considerably faster, even up to 20%.
Daniel Nizynski, React Native Developer
5. New Architecture
React Native updates may introduce significant changes in the architecture and internal workings of the framework. These changes can lead to better resource management, improved memory handling, and higher application performance. Staying updated allows you to take advantage of these architectural improvements.
The new Fabric rendering engine receives a significant performance boost, with higher text rendering performance, showcasing an increase of up to 27% on iOS and 18% on Android. Furthermore, the updated architecture of the JavaScript engine, Hermes, has witnessed notable performance improvements as well. This includes faster compilation of extensive object literals and several optimizations in JSON parsing.
Michal Moroz, React Native Developer
6. Access to New Features
React Native latest version frequently introduces new features and capabilities, enabling you to improve your app’s functionality and user experience. These new features can give your app a competitive edge and keep it aligned with the latest trends in mobile app development.
7. Compatibility
As mobile operating systems (iOS and Android) evolve, updating to the newer version ensures your app remains compatible with the latest platform changes. This is crucial for maintaining a great user experience across different devices.
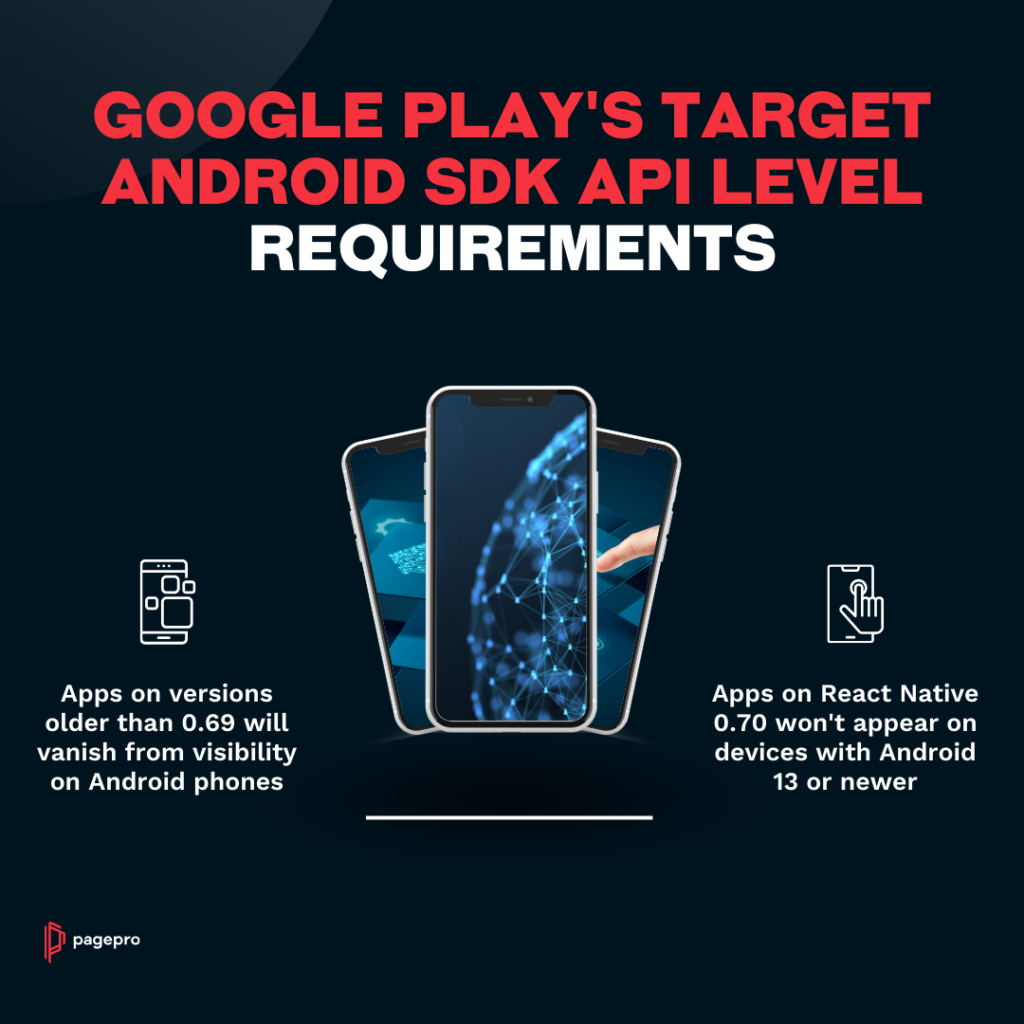
For example, Google Play’s recent update points out that, by August 31, 2023, all apps must meet the new Android SDK API level requirements.
Post-deadline, any app below version 0.69 will no longer be visible on Android devices, requiring an update to at least React Native 0.71. Additionally, while apps on React Native 0.70 will remain accessible on devices using versions prior to Android 13, they won’t be supported on Android 13 and beyond.
“The best practice is to update to the latest React Native version whenever possible. We’re working on making updates as streamlined as possible, but it’s crucial that you keep up to date.”
Nicola Corti, Android Engineer in React Native core team
Source: Github
How to Prepare for the React Native Version Update?
Updating React Native to a new version is not a task to be taken lightly. Proper preparation is essential to ensure a smooth and successful procedure. Here are the steps you should consider:
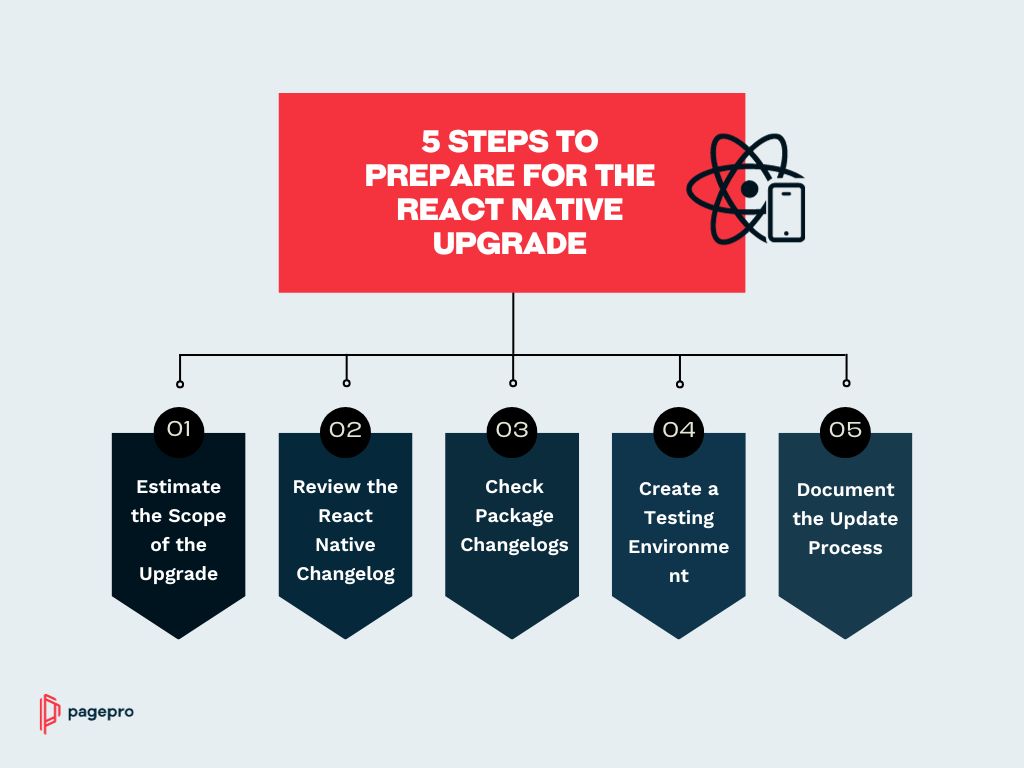
1. Estimate the Scope of the Upgrade
Before starting the update process, it’s crucial to estimate the scope of the upgrade. Consider the following:
Check Package Compatibility: First, review the packages and libraries used in your project. Verify whether they have versions that support the latest React Native release. In some cases, you might need to search for alternative packages if the current ones are not compatible.
Confirm Native Module Compatibility: If the particular project relies on custom native modules, check whether they are compatible with the new React Native version. You may need to update or refactor these modules as necessary.
Estimate Workload: Examine the changelogs of both React Native and the packages you are using. This will give you a better understanding of the changes and potential breaking updates. Estimate the amount of work required to address these changes.
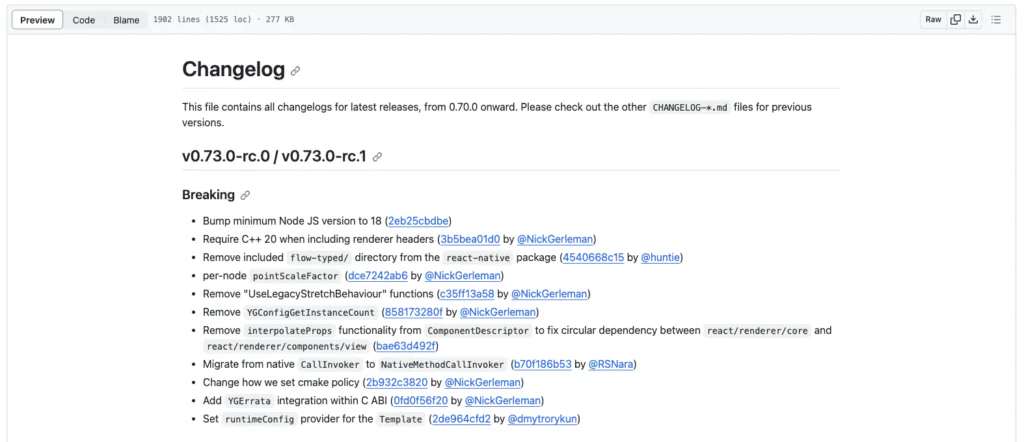
2. Review the React Native Changelog
The React Native team provides detailed changelogs for each release. These outline the changes, and potential breaking changes introduced in the new version. Carefully review the React Native changelog to identify any specific areas that may impact your application.
3. Check Package Changelogs
In addition to the React Native changelog, review the changelogs of the third-party packages and libraries used in your project. Pay close attention to any updates or modifications that could affect your app’s functionality. This step helps you anticipate issues and plan for necessary application code adjustments.
4. Create a Testing Environment
Before applying the update to your production codebase, create a testing environment. Set up a separate branch in your version control system where you can apply the update and conduct rigorous testing. This isolated environment allows you to identify and resolve issues without affecting the main codebase.
5. Document the Update Process
As you go through the update, document the steps you take and any issues you encounter. This documentation will be invaluable for future updates and for sharing knowledge with your team.
By following these preparation steps, you can make the React Native version update more manageable and less error-prone. It will also help you ensure that your app continues to run smoothly after the update.
Need someone to keep your app up-to-date?
How Can I Upgrade React Native?
Once you’ve prepared for the React Native version updates, it’s time to look into the upgrade process. I will explore two common scenarios:
- upgrading a bare React Native project
- and upgrading an Expo project.
1. Upgrading a Bare React Native Project
Upgrading React Native projects can be a complex task since they typically consist of three parts: Android, iOS, and JavaScript project. Currently, there are two methods for upgrading your React Native project: utilizing the React Native CLI or opting for a manual upgrade using React Native Upgrade Helper.
Remember: While upgrades are valuable, they should be executed with caution. Avoid automatically opting for the latest major version. Always double-check the changelog and issue tracker to stay informed about potential concerns. For production applications, it’s generally wiser to wait for at least a few minor releases before initiating the upgrade.
There are several ways to update React Native. Below, I present the most popular ones:
react-native upgrade
The React Native CLI includes an upgrade command, streamlining the upgrade process with minimal conflicts. It utilizes the rn-diff-purge project internally to identify necessary file creations, removals, and modifications.
Execute the following command to initiate the upgrade process to the latest version:
npx react-native upgrade
You can specify a React Native version by providing an argument. For example, to upgrade to version 0.72.6, use the following command:
npx react-native upgrade 0.72.6
Note: If any of these commands encounter issues, consider the second option provided below.
If your current React Native version is only a few minor versions behind the latest, the first option should suffice. However, for more extensive updates, I strongly recommend using the React Native Upgrade Helper to manually implement the changes. This approach ensures that you have a clear understanding of the modifications made and their locations, promoting a deeper understanding of the technology you are working with.
align-deps
@rnx-kit/align-deps is a versatile tool designed for dependency management, both within a single repository and across multiple repositories. It guarantees that your packages are harmoniously aligned with compatible dependencies and versions, guided by a set of defined requirements. It operates on customizable presets featuring well-vetted packages and versions collected from actual applications. Moreover, it offers the flexibility to incorporate your custom presets tailored to your specific project requirements.
How to install align-deps:
– with yarn:
yarn add @rnx-kit/align-deps --dev– with npm:
npm add --save-dev @rnx-kit/align-depsHow to use align-deps:
yarn rnx-align-deps [options] [packages...]Listing the paths to packages that should be checked is an optional step. In case this information is omitted, align-deps will automatically search for the nearest package.json using Node module resolution. It’s worth noting that if the target package serves as a root package defining workspaces, all associated packages within those workspaces will be included in the alignment process.
Example commands for align-deps:
Ensure dependencies are compatible with react-native 0.72.6 without a config:
yarn rnx-align-deps --requirements [email protected]Apply changes suggested by align-deps:
yarn rnx-align-deps --writeInteractively update supported react-native versions (or bump version used for development):
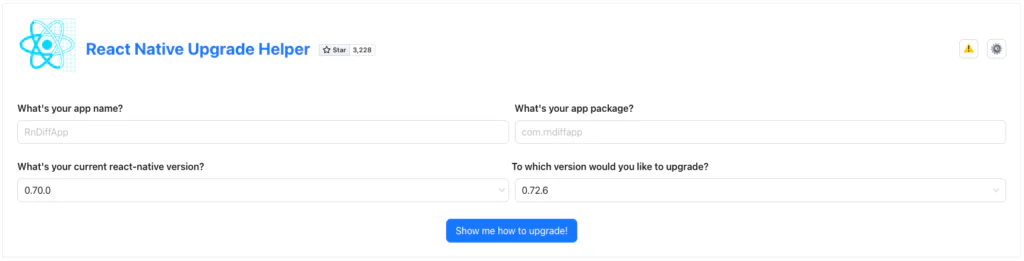
yarn rnx-align-deps --set-versionReact Native Upgrade Helper
This is a web-based tool that employs rn-diff-purge to identify disparities between versions. You’ll be required to make manual changes and save them.
Although it demands more effort, this approach offers the advantage of increasing understanding of the modifications and empowers you to investigate any details that might appear puzzling.
Select the versions
To begin, you should choose the starting and target versions for your upgrade. By default, the latest major versions are preselected. Once you’ve made your selections, you can click the “Show me how to upgrade” button.
Major updates will display a “useful content” section at the top, featuring helpful links to assist you during the upgrade process.

Upgrade dependencies
The initial file displayed is the package.json, and it’s advisable to update the dependencies listed therein. For instance, if you notice changes related to “react-native” and “react,” you can incorporate these updates into your project by running the command yarn add
yarn add react-native@[version]

yarn add react@[version]
or npm i
npm i react-native@[version]

npm i react@[version]
Upgrade your project files
The latest release might include modifications to additional files generated during the execution of ‘npx react-native init.’ These files are listed on the Upgrade Helper page, following the ‘package.json.’ A simple project rebuild will suffice to resume development if no other alterations are present.
However, if there are other changes, you have two options. You can either manually apply them by copying and pasting from the alterations displayed on the page, or you can utilize the React Native CLI upgrade command by executing:
npx react-native upgradeNew React Native app
If the aforementioned steps do not yield the desired results, an alternative approach is to start a new React Native project and transfer your project files to it. This method often proves effective when the previously mentioned options fall short.
To proceed, you will need to establish two distinct environments: one for the upgrade process and another for your existing codebase. The upgrade itself will occur in two stages. In the first step, you’ll initiate a fresh React Native project at the latest or your preferred version. Subsequently, the second step involves transferring project files incrementally while continuously verifying the functionality of the application. This method streamlines the process of identifying issues and addressing them as they arise. It can be a challenging endeavour, but it’s a necessary step in the upgrade process.
Good To Know:
– If you are migrating from a significantly older project, consider upgrading your project one major version at a time if the direct upgrade to the latest version is proving to be problematic.
– Pay attention to comments, like this one:

– Modifications in *.pbxproj files typically occur because various versions of Xcode may produce results with different ordering. Therefore, in most cases, there’s no need to make adjustments to this file.
2. Upgrading Expo project
To upgrade your Expo project to a newer React Native version, you’ll need to update the versions of the react-native, react, and expo packages in your package.json file.
Expo streamlines this process by offering an upgrade command that automatically handles the update of these packages, along with other well-known dependencies. For the most current and detailed instructions on upgrading your project, refer to the Upgrading Expo SDK Walkthrough for up-to-date information and guidance.
Below, I present the steps that should be included in the update from Expo version 48 to 49.
- Upgrade to the most recent version of EAS CLI (if you use it):
npm i -g eas-cli- Update all dependencies to align with SDK 49 (with yarn:)
yarn add expo@^49.0.0- Update all dependencies to align with SDK 49 (with npm:)
npm install expo@^49.0.0- Upgrade all dependencies to match SDK 49:
npx expo install --fix- Inspect your project’s dependencies for potential issues:
npx expo-doctor@latest- Refer to the Deprecations, Renamings, and Removals section for insights into the most probable breaking changes that may impact your application.
- Ensure to thoroughly review the changelog for any additional breaking changes.
- If necessary, update Xcode: Compiling the native iOS project necessitates Xcode 14. In the case of EAS Build, projects without a specified image will automatically adopt Xcode 14.3.1.
What to do after upgrading?
Congratulations on successfully upgrading your React Native project! However, the journey doesn’t end with the upgrade itself; there are essential post-upgrade steps to ensure your app functions smoothly.
Thorough Testing
One of the most critical tasks after an upgrade is rigorous testing. This involves running through your app’s main use cases and scenarios to identify any potential issues that may have arisen during the upgrade process. Pay particular attention to the following:
Functional Testing: Ensure that core functionalities, such as user authentication, data retrieval, and user interface components, are working as expected.
User Experience (UX): Check for any changes in the user experience, such as navigation, animations, and responsiveness, and address any anomalies.
Third-Party Libraries: Verify that third-party libraries and packages remain compatible and do not cause unexpected issues.
Device and OS Compatibility: Test your app on various devices and operating systems to guarantee it functions correctly across different platforms.
Performance: Assess the app’s performance to ensure it still operates smoothly and efficiently.
Common Post-Upgrade Issues
While React Native upgrades are intended to boost your app, they can occasionally introduce unexpected problems. Some common post-upgrade issues to watch out for include:
UI Components: Occasionally, custom or third-party UI components may break or display unexpected behaviour. Review and update them as necessary.
Obsolete APIs: The upgrade might deprecate certain APIs, leading to issues with older code. You may need to refactor these sections to align with the new APIs.
Third-Party Libraries: Some libraries may not have been updated to be compatible with the latest React Native version. In such cases, you may need to seek alternative libraries or contribute to updating the ones you depend on.
Performance Bottlenecks: An upgrade can sometimes expose performance bottlenecks that were previously hidden. Perform profiling and optimization to address any newfound performance issues.
General tips
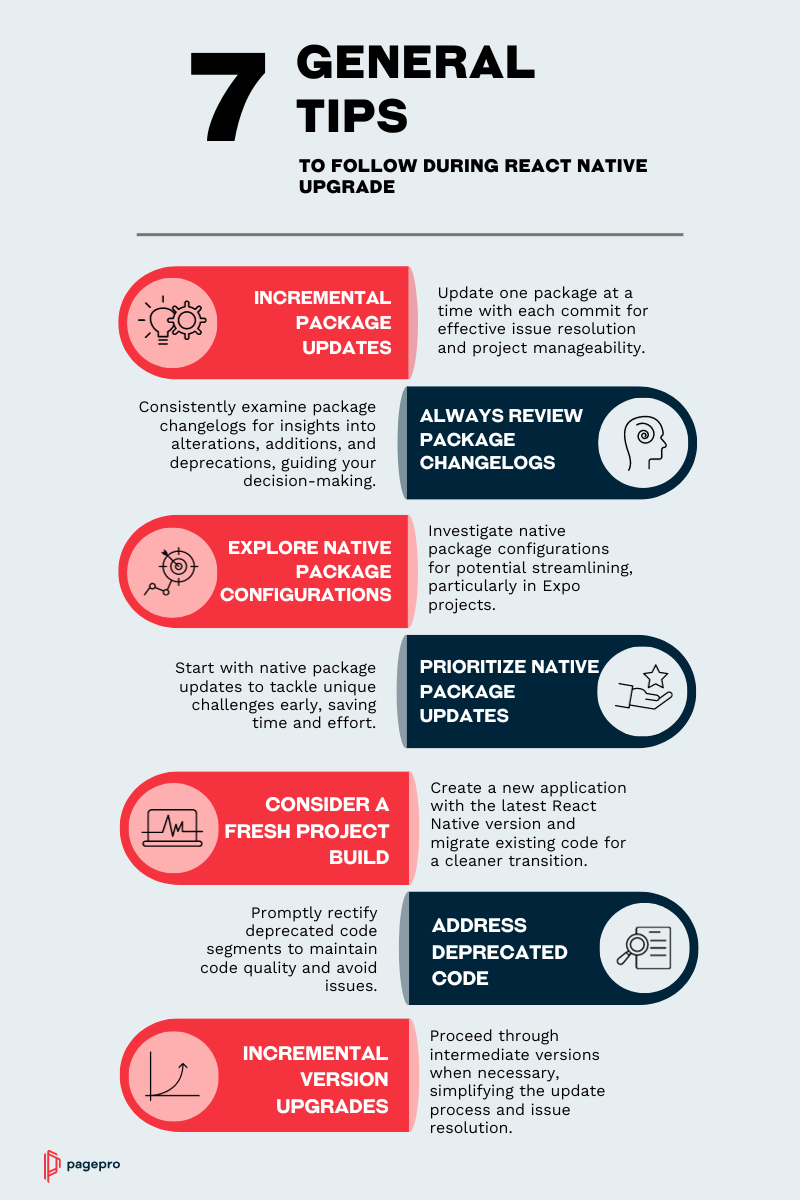
Incremental Package Updates
One effective strategy is to update one package at a time with each commit. This incremental approach allows you to pinpoint and address issues more effectively, keeping your project manageable and reducing potential bottlenecks.
Always Review Package Changelogs
It’s paramount to consistently examine the changelogs of the packages you’re updating. Changelogs serve as invaluable resources, offering insights into the precise alterations, additions, and deprecations within each package. They help you anticipate potential challenges and guide your decision-making.
Explore Native Package Configurations
While progressing through the upgrade, take the opportunity to investigate whether native packages have introduced configurations for plugins. This exploration is especially pertinent in Expo projects, as it might render manual installations unnecessary, streamlining the process.
Prioritize Native Package Updates
Initiating the upgrade process by focusing on native packages is often a judicious decision. Native packages can present unique challenges and are frequently the source of the most significant obstacles during the upgrade. Addressing these early can save time and effort down the road.
Consider a Fresh Project Build
In some scenarios, it may be more expedient to create a new application from scratch with the latest React Native version and then migrate your existing code to it. This approach can help you avoid carrying over legacy issues and ensure a cleaner transition to the updated framework.
Address Deprecated Code
Post-upgrade, it’s nearly inevitable that deprecated code segments will surface. Be prepared to dedicate time and effort to rectify such occurrences promptly. This will help maintain code quality and avoid potential issues.
Incremental Version Upgrades
Remember that it’s not always necessary to jump directly to the target React Native version. In certain cases, it may be more pragmatic to proceed through intermediate versions before reaching the final destination. This staged approach can simplify the update process and facilitate issue identification and resolution.
Conclusion
Keeping your React Native project up to date is simply a necessity. The benefits of keeping your React Native code upgraded are multifaceted. From higher security and improved stability to exciting new features and performance gains.
Remember, the React Native version upgrades may appear complicated at first, but with proper preparation and careful execution, you can ensure a smooth transition to the latest version. Regularly reviewing changelogs, prioritizing native packages, and addressing deprecated code are all essential practices in this journey.
In the end, the key takeaway is this: think of React Native version upgrades as opportunities for growth, improvement, and innovation. By doing so, you’ll continue to deliver high-quality mobile applications that meet the growing needs of your users.
Need someone to keep your app up-to-date?
Sources:
- https://docs.expo.dev/workflow/upgrading-expo-sdk-walkthrough/
- https://blog.expo.dev/expo-sdk-49-c6d398cdf740#:~:text=%F0%9F%8F%97-,Deprecations%2C%20renamings%2C%20and%20removals,-Updating%20your%20Android
- https://microsoft.github.io/rnx-kit/docs/tools/align-deps
- https://github.com/react-native-community/cli
- https://react-native-community.github.io/upgrade-helper/
- https://github.com/react-native-community/discussions-and-proposals/issues/650