
Introduction to Static Site Generation in Next.js Applications
Static Site Generators (SSG) have transformed web development over the past two decades, starting as niche tools for small, fast-loading sites and evolving into essential frameworks for high-performance applications. Early adopters, particularly Movable Type in 2001 and Jekyll in 2008 pioneered this approach, generating pre-rendered HTML that bypassed the need for server-side rendering on every page load.
The use of SSGs surged around 2015 with the advent of the Jamstack architecture, promoting a static-first approach to web development. JavaScript frameworks such as Gatsby and later Next.js contributed to SSG’s popularity by making it accessible for modern React-based applications.
Since introducing static site generation capabilities in version 9.3 (released in March 2020), Nextjs has become a leading choice for static site generation. The framework combines the speed and SEO benefits of SSG with a powerful ecosystem, enabling developers to create fast, SEO-friendly websites without compromising on user experience.
In this guide, we’ll explore how to use Next js static site generation to build and deploy high-performance, secure, and scalable web apps that elevate the user experience.
What are Static Site Generators (SSG)?
A Static Site Generator (SSG) is a tool that generates a complete static HTML website based on raw data and templates. It’s known for delivering super-fast websites because it generates pages at build time.
Next.js is considered a great option for SSG because it not only generates static pages but also provides benefits such as super-fast performance, up-to-date security, and improved user experience without compromising on SEO or the quality of the user interface.
Why USE SSG?
🚀 STATIC = FAST 🚀
Static Site Generator is extremely fast. Once loaded, they prefetch resources for other pages so navigating the site feels instantaneous
💎 STATIC = SAFE 💎
With a static site generator, you will just publish static files, which means there is no direct connection to the database, dependencies, user’s data or other sensitive information.
😎 STATIC = ENHANCED USER EXPERIENCE 😎
Simply because clicking and walking through your static website feels like a walk in a park on a sunny day with no unexpected turns, stairs, or dead ends.
Static Pages also got kind of a new brand name on the market, which is Jamstack.
What is Next.js?
Next.js is a full-stack React framework for building high-performance web applications with integrated front-end and back-end capabilities. It supports multiple rendering methods: Server-Side Rendering (SSR), Static Site Generation (SSG), and Incremental Static Regeneration (ISR), enabling high flexibility and performance for a variety of content needs. Next js applies pre-rendering by default, delivering SEO-optimized HTML that is fast-loading and optimized for user experience.
Additionally, the framework includes an intuitive file-based routing system that automatically creates routes based on the structure of the pages directory, making navigation straightforward and eliminating complex setup
With the recent addition of Partial Prerendering (PPR), Next.js allows developers can now combine static and dynamic content on the same page, which enhances load times while maintaining dynamic content for specific sections.
If you want to learn more about Next.js, be sure to watch our video:

As the most widely used React framework and now recommended by the React team as the go-to option for new projects, Next.js is well-regarded for building fast, SEO-friendly, and scalable applications effortlessly.
And in this post, we will be taking a look at the static page export functionality and how we use static generation with Next.js
Let’s go!
Creating and Configuring a Next.js App for Static Site Generation
We will start by creating a new Next app. To do that simply run the command:
yarn create next-app
# or if you are using npm
npx create-next-app
Now, let’s take a look at our project structure:
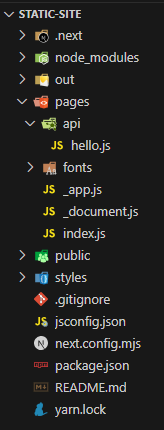
pages – this directory contains all our pages and defines routing for our app (more about routing here).
pages/api – here we can add our API endpoint if we need some, in our case we can remove this folder safely (more about API routes here).
public – we can put all our static assets in this directory.
Let’s change the project configuration to reflect what we want to achieve in this project.
Go to next.config.mjs and modify it to look like this:
```
/** @type {import('next').NextConfig} */
const nextConfig = {
  reactStrictMode: true,

  output: 'export', // This will make our build static

  images: {
    unoptimized: true, // Image optimization is disabled in static builds
  }
};

export default nextConfig;
```
Now we can test our configuration, run the build command:
yarn run build
# or if you are using npm
npm run build
Next should create out the directory at the root of our project with all the static HTML files and assets ready to host. We can change the out directory by adding distDir to next.config.mjs like this:
```
/** @type {import('next').NextConfig} */
const nextConfig = {
  ...
  distDir: 'build',
  ...
};
export default nextConfig;
```
Not sure if Next.js is for you?
Adding Content to Page
Let’s head to pages\index.js file and remove the content of Home component and change it like this:
const Home = () => {
  return (
    <p>
      Hello From my next.js app!
    </p>
  )
}

export default Home;
And start our app by running command:
yarn run build
# or if you are using npm
npm run build
Now you should be able to access http://localhost:3000 and see our Home component content.
Now let’s add some content that will be evaluated at the build time. We can do that by using getStaticProps which is a function exported from our page. As we don’t have any data source configured yet we will do a simple example to show how getStaticProps work.
const Home = ({ buildTimestamp }) => {
  return (
    <p>
      Hello From my next.js app!
      App built at: {buildTimestamp}
    </p>
  )
}

export const getStaticProps = () => {
  return {
    props: {
      buildTimestamp: Date.now()
    }
  }
}

export default Home;
We will see that buildTimestamp changes every refresh, this will not be the case when we build our app because getStaticProps is called only once when the app is building.
Adding Data Source
We already know how getStaticProps works, now we can make it more useful and add some external data sources to our app. Next.js doesn’t come with any data provider built-in (for example GatsbyJS has GraphQL) so we will have to add it manually.
Basically, you can load your data however you like. In this tutorial, we will use GraphQL with Apollo Client. First, let’s add a src directory where we will keep all our code shared between pages. Then create src\setup\apolloClient.js file where our Apollo client will be created.
import { ApolloClient, InMemoryCache } from "@apollo/client"

const apolloClient = new ApolloClient({
  uri: "https://gitlab.com/api/graphql",
  cache: new InMemoryCache()
})

export default apolloClient
Additionally, we will have to install some Apollo-related packages. Simply run the command:
yarn run add @apollo/client graphql
# or if you are using npm
npm install --save @apollo/client graphql
As you can see we will be using GitLab graphQL API (explorer is available here).
Creating Pages and Fetching Data in Next js
Now we can fetch some data, let’s fetch some repositories. First, we have to create GraphQL query:
const PROJECTS_QUERY = gql`
  query {
    projects (first: 10) {
      nodes {
        id
        name
        description
      }
    }
  }
`
Now we can import Apollo client and use it with the above query in our getStaticProps:
export const getStaticProps = async () => {
  const { data } = await apolloClient.query({
    query: PROJECTS_QUERY
  })

  return {
    props: {
      projects: data.projects
    }
  }
}
Now list of GitLab projects is available in our Home component props, let’s render it.
const Home = ({ projects }) => {
  return (
    <ul>
      {projects.nodes.map(({ name, description, id }) => (
        <li key={id}>
          <p><strong>{name}</strong></p>
          {description && <span>{description}</span>}
        </li>
      ))}
    </ul>
  )
}
And that’s it, we have a working GitLab projects list.
Now let’s add project detail page.
First, we have to add a dynamic route to our app, we can do that by creating a file with square brackets in its name, like this:

More about dynamic routing here.
When we are building our pages statically Next.js requires us to export a function called getStaticPaths from our page.
We have to do that because Next.js needs to know all the page URLs and their params at the build time. We have fetched the first 10 Gitlab projects at our homepage so now we have to do the same in our getStaticPaths to generate URLs.
Let’s add links to project details on the homepage. We have to add fullPath field to our query:
const PROJECTS_QUERY = gql`
  query {
    projects (first: 10) {
      nodes {
        id
        name
        description
        fullPath
      }
    }
  }
`
And render next link for every project:
const Home = ({ projects }) => {
  return (
    <ul>
      {projects.nodes.map(({ name, description, id, fullPath }) => (
        <li key={id}>
          <p><strong>{name}</strong></p>
          {description && <span>{description}</span>}
          <div>
            <Link href={`/project/${fullPath}`}>
              Details
            </Link>
          </div>
        </li>
      ))}
    </ul>
  )
}
Now we can add code to our project details page:
import gql from "graphql-tag";
import apolloClient from "../../src/setup/apolloClient";

const ProjectDetailsPage = ({ fullPath }) => {
  return <>Project details page {fullPath}</>
}

export default ProjectDetailsPage;

const PROJECTS_QUERY = gql`
  query {
    projects(first: 10) {
      nodes {
        fullPath
      }
    }
  }
`

export const getStaticPaths = async () => {
  const { data } = await apolloClient.query({
    query: PROJECTS_QUERY,
  })

  return {
    paths: data.projects.nodes.map(({ fullPath }) => ({ // 1
      params: { fullPath: fullPath.split('/') },
    })),
    fallback: false, // 2
  }
}

export const getStaticProps = ({ params }) => {
  return {
    props: {
      fullPath: params.fullPath.join('/') // 3
    },
  }
}
Let’s explain some key parts here:
- We map our projects list to an array of paths required by Next.js. Structure that Nexts.js expects looks like this:
{
  paths: [
    {
       params: {
         (all params that we want to pass to getStaticProps)
       }
    }
  ]
}
Also when we use Catch All route we have to pass our param as array that’s why we use split here.
- We have to tell Next if we want to render missing pages live or just return 404. In our case we are making fully static page so we define fallback as false. More about fallback here.
- We merge our fullPath param to single string so we can display it nicely in our component.
Now we can change getStaticProps to be more useful and fetch some project data for us. First, we need a query for project details:
const PROJECT_DETAILS_QUERY = gql`
  query ($fullPath: ID!) {
    project(fullPath: $fullPath) {
      name
      descriptionHtml
      repository {
        empty
        tree {
          lastCommit {
            sha
          }
        }
      }
    }
  }
`
And run it inside our getStaticProps
export const getStaticProps = async ({ params }) => {
  const fullPath = params.fullPath.join('/');
  const { data } = await apolloClient.query({
    query: PROJECT_DETAILS_QUERY,
    variables: {
      fullPath
    }
  })

  return {
    props: {
      project: data.project
    }
  }
}
Now we can display some data on our project details page:
const ProjectDetailsPage = ({ project }) => {
  const {
    name,
    descriptionHtml,
    repository: {
      tree
    }
  } = project
  const { lastCommit } = tree || {}
  const { sha } = lastCommit || {}

  return (
    <div>
      <h1>{name}</h1>
      <p dangerouslySetInnerHTML={{ __html: descriptionHtml }} />
      {sha && <p>Last commit SHA: {sha}</p>}
    </div>
  )
}
And that’s it, we have created a static page displaying first 10 GitLab projects and their details.
We can now build it and serve to check if everything is working properly.
yarn run build
# or if you are using npm
npm run build

# if you are using yarn and don't have serve installed run this command first
yarn global add serve


# if you are using yarn
serve ./build
# or if you are using npm
npx serve ./buildNext.js vs React
We’ve also made a comparison between Next.js and React:

Conclusion
If you want to create an outstanding web project, using Next.js for Static Site Generation (SSG) delivers you a powerful way to build websites that are fast, secure, and SEO-friendly, without sacrificing flexibility. With easy setup commands, seamless routing, and features such as getStaticProps and getStaticPaths, Next.js offers a straightforward approach to creating static pages. The framework’s ability to integrate external data sources using tools such as Apollo Client further enhances its utility for creating dynamic, data-rich sites.
Lastly, with Partial Pre-render (PPR), Incremental Static Regeneration (ISR), and server-side capabilities, Next.js combines the best of static and dynamic web content management, allowing developers to create pages that load instantly yet stay updated with minimal overhead.
FAQ
Can Next.js Integrate with Data Sources, and How Can It Fetch Data at Build Time?
Yes, Next.js can integrate with various data sources. For fetching data at build time, Next.js offers a function called getStaticProps. This function of Next.js supports fetching data and passing it as props to your page at build time. Although Next.js doesn’t come with a built-in data provider, you can easily integrate it with external data sources, for example, GraphQL with Apollo Client or any other API of your choice.
What Makes Next.js Static Site Generation a Preferred Choice in 2025?
Next.js continues to be a popular choice for static site generation due to its speed, performance, and SEO benefits. It offers exceptional speed through static generation and optimized code, which reduces bounce rates and improves SEO rankings. Additionally, its ecosystem is rich, supported by Vercel and Meta, ensuring a future-proof and scalable solution for web development. Regular updates and a vibrant community contribute to its strategic advantage for tech leaders.
How Does Next.js Compare to Other Tools for Static Generation of Sites like Astro or Eleventy in 2025?
Next.js is characterised by its flexibility in offering multiple rendering methods, including SSG, SSR, Incremental Static Regeneration, and Client-Side Rendering, making it suitable for complex projects.
In contrast, Astro is highlighted for its content-driven approach and ease of use without requiring knowledge of specific frameworks such as React or Vue. Eleventy is praised for its simplicity and flexibility, being framework-agnostic and offering a straightforward setup for projects of various complexities
Are you ready to start your new Next.js project?
Read more
30 Great Examples of Next js Websites
How to Rank Higher on Google with Next js
What Is Next Js And Why Should You Use It In 2025?
Next Js Vs Gatsby Js – Which One To Choose?
What Is Next Js And Why Should You Use It In 2025?