What is an OTA update?
Over-the-air (OTA) are… updates that are sent over the air. Yeah, I know that does not explain anything but bear with me. Expo OTA updates are a fantastic method to swiftly fix your application without the usual delays. It enables you to bypass the App Store or Google Play store entirely when releasing an update.
Imagine that your mobile app has a critical bug in production and releasing a fix can take days to reach your customers. Even if it’s a quick fix, each update released to the App Store or Google Play has to go through a store review process before it’s approved.
This process can be a bit of a pain, especially because it can be time-consuming and sometimes costly, and let’s face it, every hour counts because you don’t want to miss out on potential users just because your app isn’t working as it should. This is where Expo’s over-the-air update function comes in handy for all mobile app developers.
Expo OTA updates let you send critical bug fixes immediately without even worrying about verification times, which helps to improve user experience!
It is a feature exclusive to React Native mobile applications because of its unique functionality. They comprise two key components: native code and the JS bundle. The JS bundle, which contains about 90% of the application logic, can be completely replaced using OTA updates.
Interested? Let’s implement OTA in your Expo app!
Creating a New Expo Application
First, let’s start with creating a new Expo application. To do this, simply run this command in the terminal where “my-app” will be the name of your application.
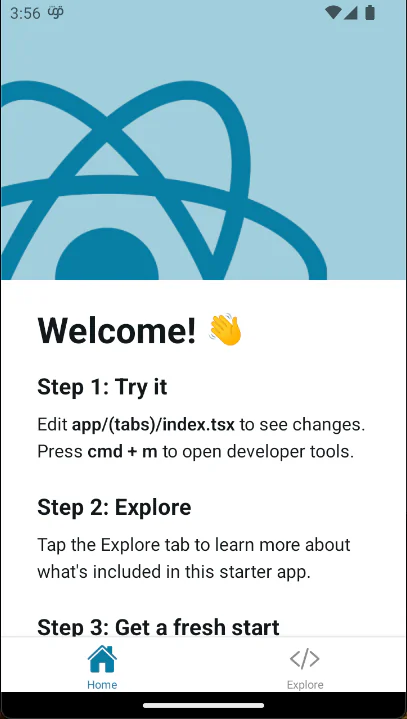
npx create-expo-app my-appThis will create a new project for us and install all necessary dependencies to run the application. To test if it works it can be opened by running.
# go to the project directory
cd my-app

# for android
npm run android

# for ios
npm run ios
You should be seeing an app like this:

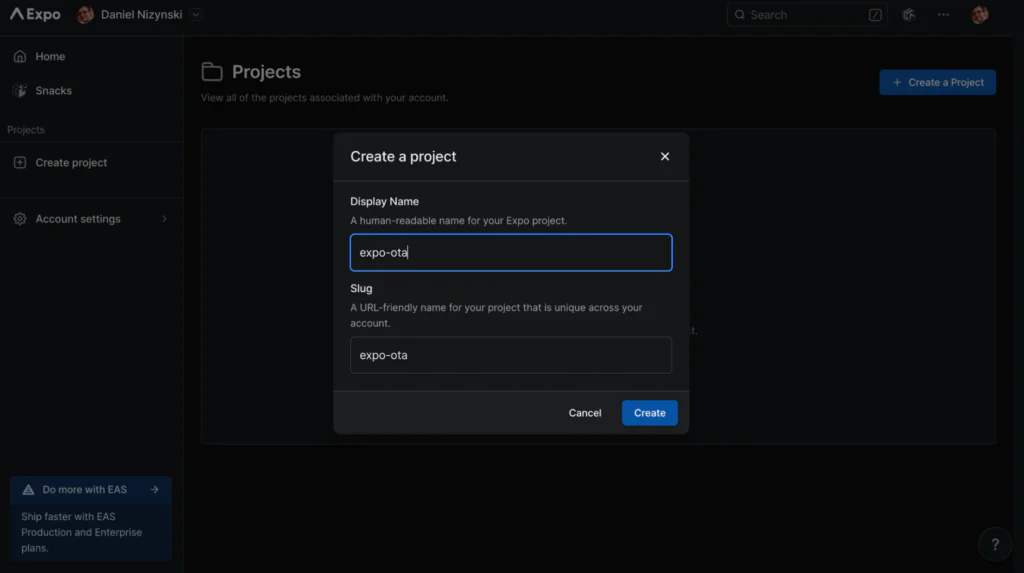
The next step is to create a new application on https://expo.dev
And then link it to our local application by running the command shown on the screen:
npm install --global eas-cli && \
eas init --id <id_of_your_project>
With this, we are ready to add OTA updates to our app!
Not sure where to start with your mobile app?
Adding OTA Feature to the Expo App
First, we need to install the expo-updates library and then configure both EAS build and updates to work properly. This can be done with the following commands (please run the commands in the provided order).
npx expo install expo-updates
eas build:configure
eas update:configure
After running these commands you should see some changes made to your project. The file that interests us the most is the eas.json file, it should look something like this:
{
 "cli": {
   "version": ">= 11.0.2"
 },
 "build": {
   "development": {
     "developmentClient": true,
     "distribution": "internal",
     "channel": "development"
   },
   "preview": {
     "distribution": "internal",
     "channel": "preview"
   },
   "production": {
     "channel": "production"
   }
 },
 "submit": {
   "production": {}
 }
}
This file contains the profiles for each of our build profiles. Running the “eas update:configure” command has added a “channel” key for our profiles. This key allows us to which profile receives specific updates for our app. Don’t worry, we’ll dig into the details of channels shortly. First, let’s check if our updates work!
Pushing the First Update
Before we can check if our updates work we have to build a standalone version of our app as development or Expo Go builds are designed to always load the latest available bundle.
We will create a build with the “preview” profile which by default is intended for internal distribution to showcase the application. To do this run the following command:
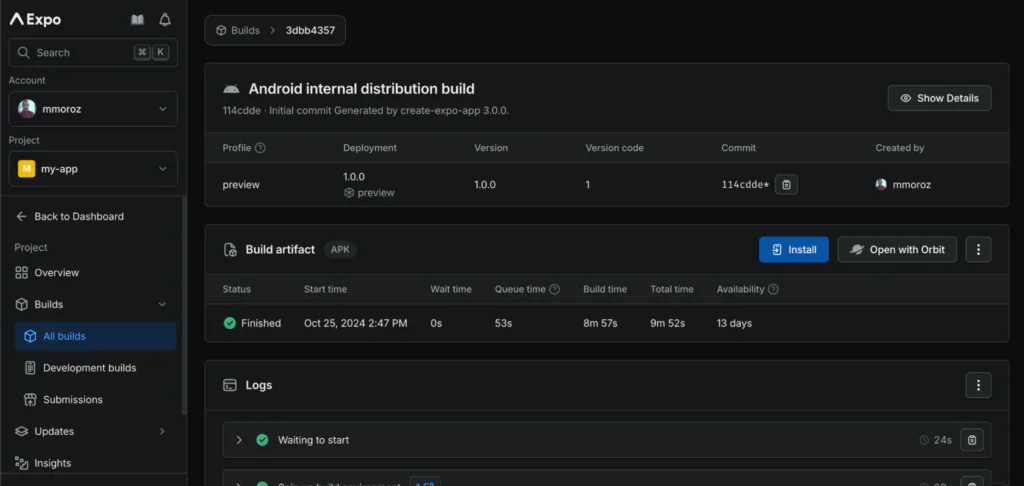
eas build --profile preview --platform androidAfter the build is completed you can download it on https://expo.dev under the “builds” page. You can either install it on your real device by using the QR code shown after pressing the “Install” button or download an apk file by pressing the options -> download build and drag it onto your simulator.
As you launch the application you will notice one major difference right away: the absence of the Expo Go client. Your app is built in a standalone version which looks and behaves like a production version of your application. But just like before you will see the same screen as we had originally in our app saying “Open up App.js to start working on your app!”
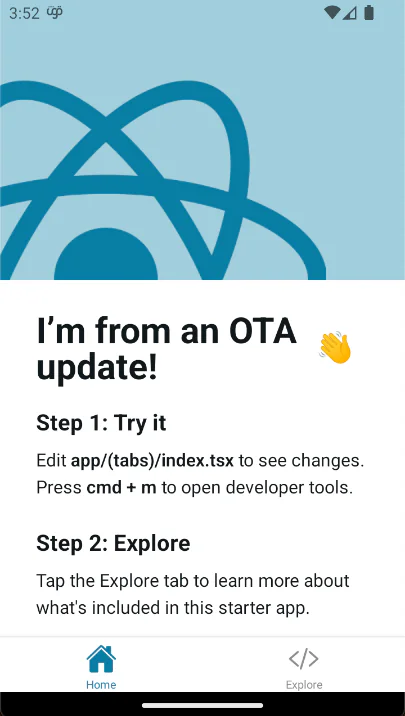
Let’s now make a change and push it to our already-built app! Open the “App.js” file and change the Welcome text to I’m from an OTA update!
import { Image, StyleSheet, Platform } from 'react-native'


import { HelloWave } from '@/components/HelloWave'
import ParallaxScrollView from '@/components/ParallaxScrollView'
import { ThemedText } from '@/components/ThemedText'
import { ThemedView } from '@/components/ThemedView'


export default function HomeScreen() {
 return (
   <ParallaxScrollView
     headerBackgroundColor={{ light: '#A1CEDC', dark: '#1D3D47' }}
     headerImage={
       <Image
         source={require('@/assets/images/partial-react-logo.png')}
         style={styles.reactLogo}
       />
     }
   >
     <ThemedView style={styles.titleContainer}>
       <ThemedText type="title">I’m from an OTA update!</ThemedText>
       <HelloWave />
     </ThemedView>
    . . .
We can easily preview the changes that we have made by running “npm run android” but these are only visible to us. To push this change to all users who have installed our app in the “preview” channel we have to run this command:
eas update --branch preview --message "Example update"This command will create a new js bundle with the changes we have made and send it to expo servers so it is available for our users. The “message” argument is a short description of our update. We will discuss the “branch” argument later together with channels.
Let’s Check our Expo OTA Update!
Open the standalone app we have installed previously on the device and… there are no changes. Why is that? Let me explain.
The default behaviour of expo-updates is to check for available updates at every app launch. If there are any updates available the newest of them is downloaded in the background while the app is running without the user even noticing it.
But the app is not waiting for the updates to download before showing the user the app nor is it reloaded when the update is downloaded (but it can do that if you want).
By default, after the update is downloaded the user will be able to see the updated version of the app on the next launch. Go on and check it! After you restart the app you should see the changes!
Do keep in mind that you have to keep the app running for a couple of seconds before restarting so it has enough time to download the update.
But What About These Channels and Branches?
Right, right, channels and branches. As I said before these are used to control which “profile” of our app will receive specific updates. A build profile is always tied with a channel, and you can see this in the eas.json file. Each time you want to change the channel for a particular profile you will have to create a new build of the application.
On the other hand, there are the updates we make. They are always tied to a “branch”. When we want to push an update to a specific channel we have to link that channel to our branch. We can do this by running this command:
eas channel:edit production --branch version-2.0We didn’t have to do that in our case because we named our branch the same as our channel. By default, channels are linked to branches with the same name.
So what does this additional layer give us? Flexibility! Let’s say that you push an update so your internal testing team can check it and you name your branch “fix-1234”. After the testing is done and the fix is confirmed you don’t have to do another push to your production channel.
Simply link your production channel to the “fix-1234” branch and your users will start receiving the update! Doing it this way ensures that no potential changes will be included in the production update and the deployed code is the same as the one verified by testers.
And that’s it! But…there are things to consider.
Things to Keep in Mind About Expo OTA Updates
While OTA updates may seem to be the best way to deliver updates to your app they cannot be used in all scenarios.
Firstly, if you make any changes to the native code, OTA updates won’t work. Remember, Expo OTA updates solely update the JS bundle and not the native code. Pushing an OTA update with native changes can potentially break the app for end users since the JS code may reference native modules that can not exist.
To ensure that your users always receive the correct updates for their native app version you can use the “expo.runtimeVersion” key located in “app.json” file. Make sure to update its value before making any changes to the native Android and iOS code and pushing the update.
Secondly, you shouldn’t implement new features with over-the-air updates, because such changes omit Apple and Google verification. Expo OTA updates are typically meant to publish bug fixes that will later be included in the base application published in the respective app stores.
Happy coding!
Ready to start using OTA updates in your React Native App?
Read More
Migrating a Native App to React Native? Here’s How Expo Can Help