Intro
UX design and UI design are the second phase of the mobile app development process, and it doesn’t mean it’s less important than any other step. How your app works and looks can be a determining factor in customers’ purchasing decisions.
A high churn rate (number of people who abandon the app after using it a few times) keeps many apps’ owners awake.
One of the main reasons for mobile apps abandonment is not intuitive design with an unattractive or illegible user interface.
The rule is simple: the less time customers spend in your app on the work they want to do, the bigger chance they will use it again.
In this article, we will show you how to build UX and UI in mobile app development from scratch.
This article is a part of the “Mobile App Development Process” series.

UX and UI design process
User experience and user interface design are crucial elements of a product and work closely together. But even though they are inseparable, their roles are quite different, as they refer to different aspects of the product development process and design discipline.
| UX design | UI design |
|---|---|
| Human-first approach to product’s design | Human-first approach to design the aesthetic experience of a product |
| Process of building products that provide great user experience | Process of transformation wireframes into attractive and easy to use interfaces |
| Focused on users and their journey through the product | Focused on visual and interactive elements |
| Aims to improve the user interaction and experience of products | Aims to create attractive, simple to use and scalable product |
The UX and UI design in mobile apps improves the user experience that influences customer satisfaction. And satisfied users are often a source of conversions and recommendations for your application.
Well-chosen features shown in a simple and aesthetic way are a composition that’s hard to ignore.

Steps of the UX design and UI design in mobile app development
Let’s be honest, you’ve started the design process during the first stage of developing products – planning.
While you were making decisions about the main features, target audience and platform, you probably initially established the main look and feel of the app.
Now is the time to make it real and adapt to the market.
The main steps of creating the user centered design are:
- Creating user-journey map
- Building UX wireframe
- Building prototype
- Graphic design
- Usability testing
Creating a user journey map
User or customer journey map shows how the users interact with the application and what steps they take to complete the desired actions.
It’s an important part of the broader user research and a visual representation of the entire user journey, from the point they discovered the application to when they converted, including every interaction they have with the app.
Why are user-journey maps important?
- Mapping the customer journey provides you with critical insights about optimising the customer experience and eliminating the pain points through the app.
- They put the user at the heart of your outreach. Once you know how the user interact with the product, you can prepare better, more personalised messages to reach a further audience.
How to map the user’s interaction
In the basic form, journey mapping starts by setting the series of users actions into a timeline. It’s then filled with users potential thoughts and emotions to create a narrative. Once it’s squeezed and polished, it leads us to a visualisation.
Create user personas
During the planning phase you did user research and chose the target audience. Now is the time to prepare user profiles that represent different segments of the audience.
Providing one point of view per map is helpful to build a clear narrative. F.e. if you are creating an app for schools to improve remote learning, you have to think about different users: teachers, parents and students, who will use your app in different ways. Only after that, you can create separate maps for each scenario.
Create the scenario and set the expectations
A scenario is a potential situation that the user map addresses. It’s in line with the customers’ goals and expectations.
Customers usually have a very specific goal for using a mobile app. Make sure you know why and how they would use your product.
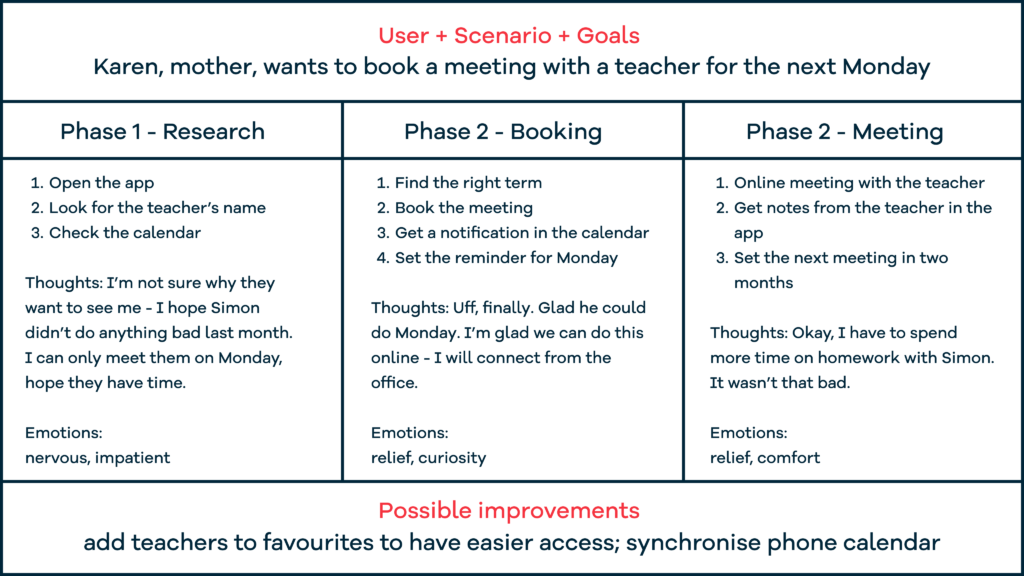
In our example, the potential scenario can be a quick meeting between a parent and a teacher, and the expectation (of the parent) can be to book the most suitable time.
Journey Phase
Journey phases provide further information, like actions, thoughts or emotions. Those stages will vary from scenario to scenario.
Improvements
Once you create a map, you will get information on how the user experience can be optimised and apply the changes to your project.
Check out the example of a customer journey map below:
Ready to build your app?
UX wireframe
A wireframe is a layout that shows the main elements in the overall structure. It focuses on how a user would interact with your app. The purpose of UX wireframing is to define the user flow and details like the number of windows, CTA buttons and how they work, login and registration process, etc.
UX wireframe is only a sketch, usually with a block layout, with lines representing the text and rectangles instead of the images.
To start the wireframe creation, try to answer the following questions:
- What is the best way to organise the contest to support the customer’s goal?
- What information is the most important? Where should it be placed?
- What should users see first?
- What do users expect to see in a certain area?
- Which buttons do users need to complete the actions?

Here are some guides that will optimise your work:
Set a mobile frame
Even though it’s only a sketch, and you can start with a rectangle as a frame, it’s much better to select the frame that has the dimensions of an actual mobile device you design for. As nowadays there are many options for screen sizes, it’s recommended to start with a device with middle screen size.
Determine layout with boxes
At the first stage of wireframing, you aim to create a visual hierarchy. Focus on the order of information you want to present. Remember that users scan phone screens from top to bottom and left to right. The size of objects can define the hierarchy of elements.
Use design patterns
Your customers possibly use different apps in everyday life and so they have some habits. When they recognise familiar elements in a new app they can rely on their previous experience in interacting with your product. Both Android and iOS have native patterns, as their users expect consistency in the mobile apps’ looks and behaviour.
Following the UX laws
Humans use patterns for perceiving and processing the world around them, and psychology helps us decode it. Instead of forcing customers to adapt to the design, try to use key principles from psychology to design in a way that is adaptable to people. Here you can find some more common UX laws to follow in your project:
Hick’s law
Hick’s law states that the time taken to make a decision increase with the number and complexity of choices present. The main function of this law is to direct users to functions of top priority, help them reach CTA faster and increase the conversion rates.
A great example of Hicks laws is the Uber app – from default, it shows your current location so you don’t have to decide whether you should look for any better place to get a taxi. Also Spotify uses Hick’s law a lot too as it learns which songs you are skipping on your everyday use and learn what music do you prefer – later on, you can find a personalised ‘Daily Music’ playlist with your latest favourites.

Goal gradient effect law
It states that the closer person is to complete a task, the faster they work towards reaching it. If you provide clear information about the progress it motivates users to complete tasks.
Many apps use it to keep people engaged. A great example can be the Starbucks app, where you get rewards for the coffee you buy, the Prana Breath app, where the more exercise you do, the better scores you achieve or even the app which help you quit smoking and shows you how much healthier you get.

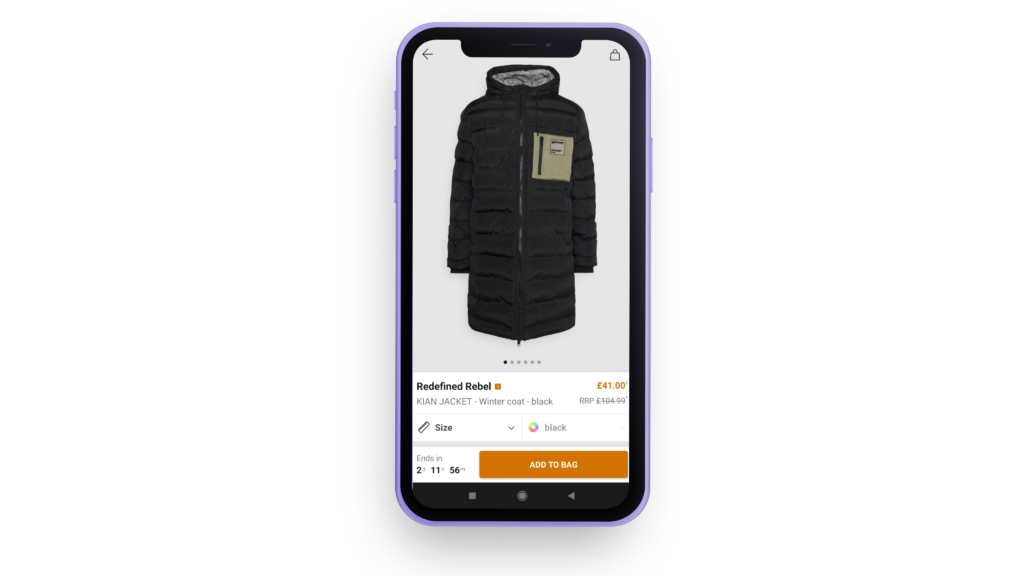
Fitt’s law
Fitt’s law states that the time to acquire a target is a function of the distance to and size of the target. That means that the touch target should be large enough to be clicked, and placed in an area to be easily acquired. It’s an important case, especially in mobile apps, where spacing and easy access to buttons is crucial.
Zalando Lounge do this well as they placed a button to put a product in a basket on the bottom right corner – it’s eye-catching and easy to reach for your thumb.
Building prototype
A prototype is an interactive mockup that aims to test and improve the functionality of the app – and most cross-platform mobile app development companies recommend it. Creating a simple click-through model lets you check all the screens and decide if the navigation makes sense for a new user.
There are two ways of mobile app prototyping:
- Rapid prototyping, where the created product is not used after testing. This approach doesn’t take a lot of time, as it’s designed only to test the ideas.
- Evolutionary prototyping, where the prototype is the future core of the app (MVP). Its features are added subsequently till it became the full version of the app.
If you want to learn more about the differences between MVP and prototype, watch our video.

In simple words, a rapid prototype is designed to test the ideas, while an MVP is created for testing the product and its functionalities.
| MVP | Prototype |
|---|---|
| Goal: Community Feedback | Goal: Internal feedback |
| Working Product | Presentation of a product |
| Focused on functionalities | Focused on designs and UX |
| Requires development | Requires UX design |
Quick poll
What would you prefer to use to validate your idea?
UI design
All the steps taken before aimed to define how the app will work.
And now is the time to concentrate on the visual design. This is a super important step as the appearance will leave a permanent impression on your end users.
A professional, eye-catchy and beautiful design is one of the main aspects working on your app’s success.
During this step, you have to choose the visual representation of the concept, colours, fonts, shapes and many other things that will make your app attractive.
UI Design Principles
During the design process you should remember about the most common user interface design principles:
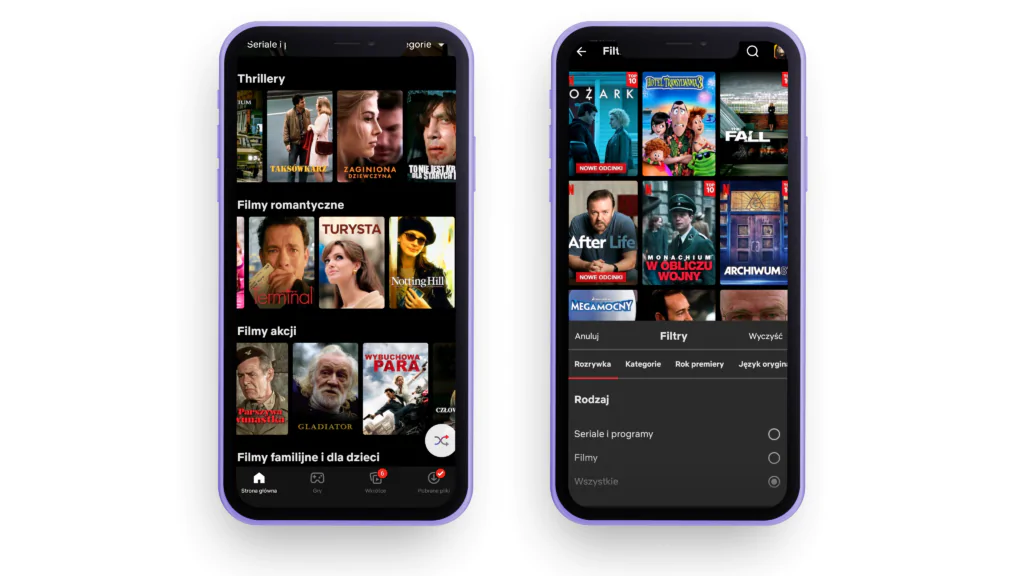
Structure Principle
Elements should be organised purposefully, in meaningful and useful ways. The structure should be based on clear and consistent models that are recognizable to users.
Movies and series in the Netflix app are categorised by type and you can easily filter or sort it in the way you want.
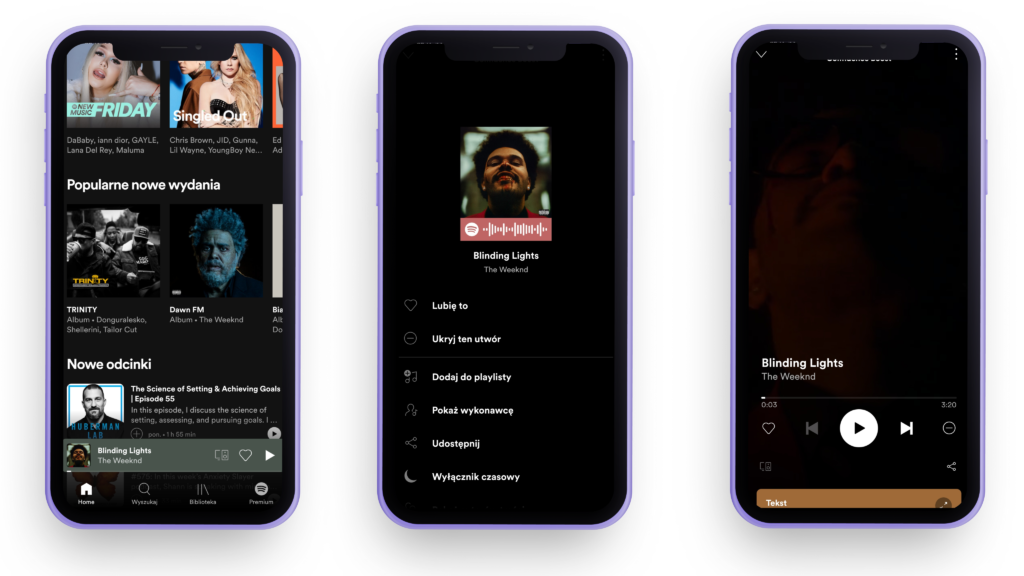
Simplicity Principle
An app should be designed in a way that makes simple, common tasks easy. Using popular symbols and phrases help people understand how things work.
On Spotify, you can simply add the song to favourites by clicking on the heart icon – and you can do this whenever you see the name of the song.
Visibility Principle
The design can’t overwhelm or distract users. All elements needed for a given task should be visible and easy to find.
Just like on the eBay app – as they now have a special offer, they’ve created Valentine’s menu, where you can simply find the most popular categories on the main screen.

Reuse Principle
The design of the app should reuse internal and external components in a way to reduce rethink and remembering.
If you are designing a mobile app for your shop, follow the interaction design principles, like putting an icon of a basket or a trolley on the right top corner, as people would expect it to be there – just as it is on the Amazon app and most of the online shops’ websites.

Usability Testing
Testing is a powerful tool that helps you determine the app’s functionality and make sure that users can navigate the app efficiently and effectively. It’s an essential step that enables you to validate the decisions you’ve already made and influence future decisions.
During this process, you let people interact with your app and observe their behaviour and reactions.
There are different ways and methods to run the tests, but all of them should be subject to the bellowed practices:
- Test as early as you can and as often as you can
- Ask open-minded questions
- Observe behaviours and listen to the users
- Don’t try to solve all the issues at once – fix the most important issues first, then test again
Do and don’ts in mobile app designs
As of 2021 Google Play has over 3,482,452 available apps and an Apple App Store of about 2,226,823 – and so we can only imagine how many tests were running before to find out what works best for effective and enjoyable use.
Thanks to that we can establish some rules for good usability and user friendly interface design:
- Cut out the clutter – get rid of anything that isn’t absolutely necessary
- Navigation should be available at all times
- Build for one-handed operation
- Make the app fast and responsive
- Don’t replicate web experience on an app
- Personalise the experience as much as possible
Trends in app design in 2022
Following the design trends should be on your ‘to-do’ list if you want your app to become successful.
We’ve chosen some of the trends you need to consider during the app development:
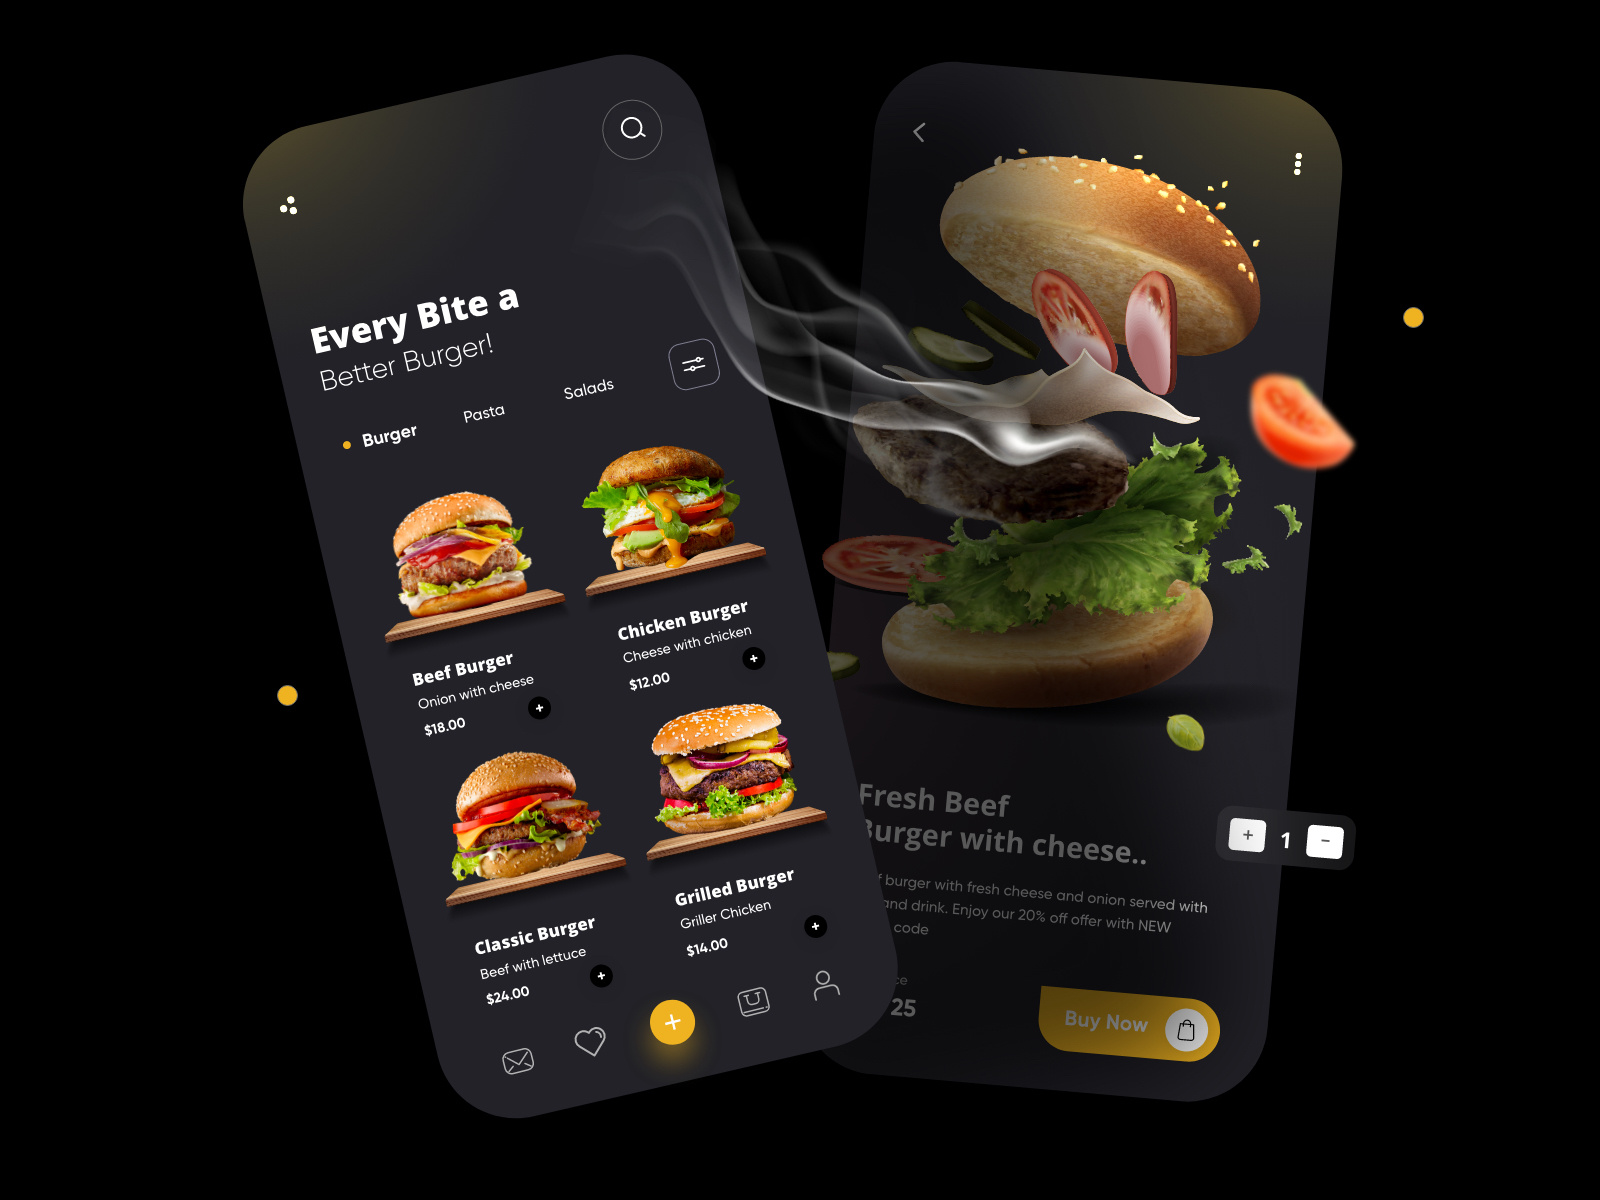
3D
One of the top design trends followed by UX designers is good, old 3D. The popularity of this method increased thanks to the development of augmented and virtual reality technologies. Users love to see depth on the screen and 3D helps them better understand the navigation.
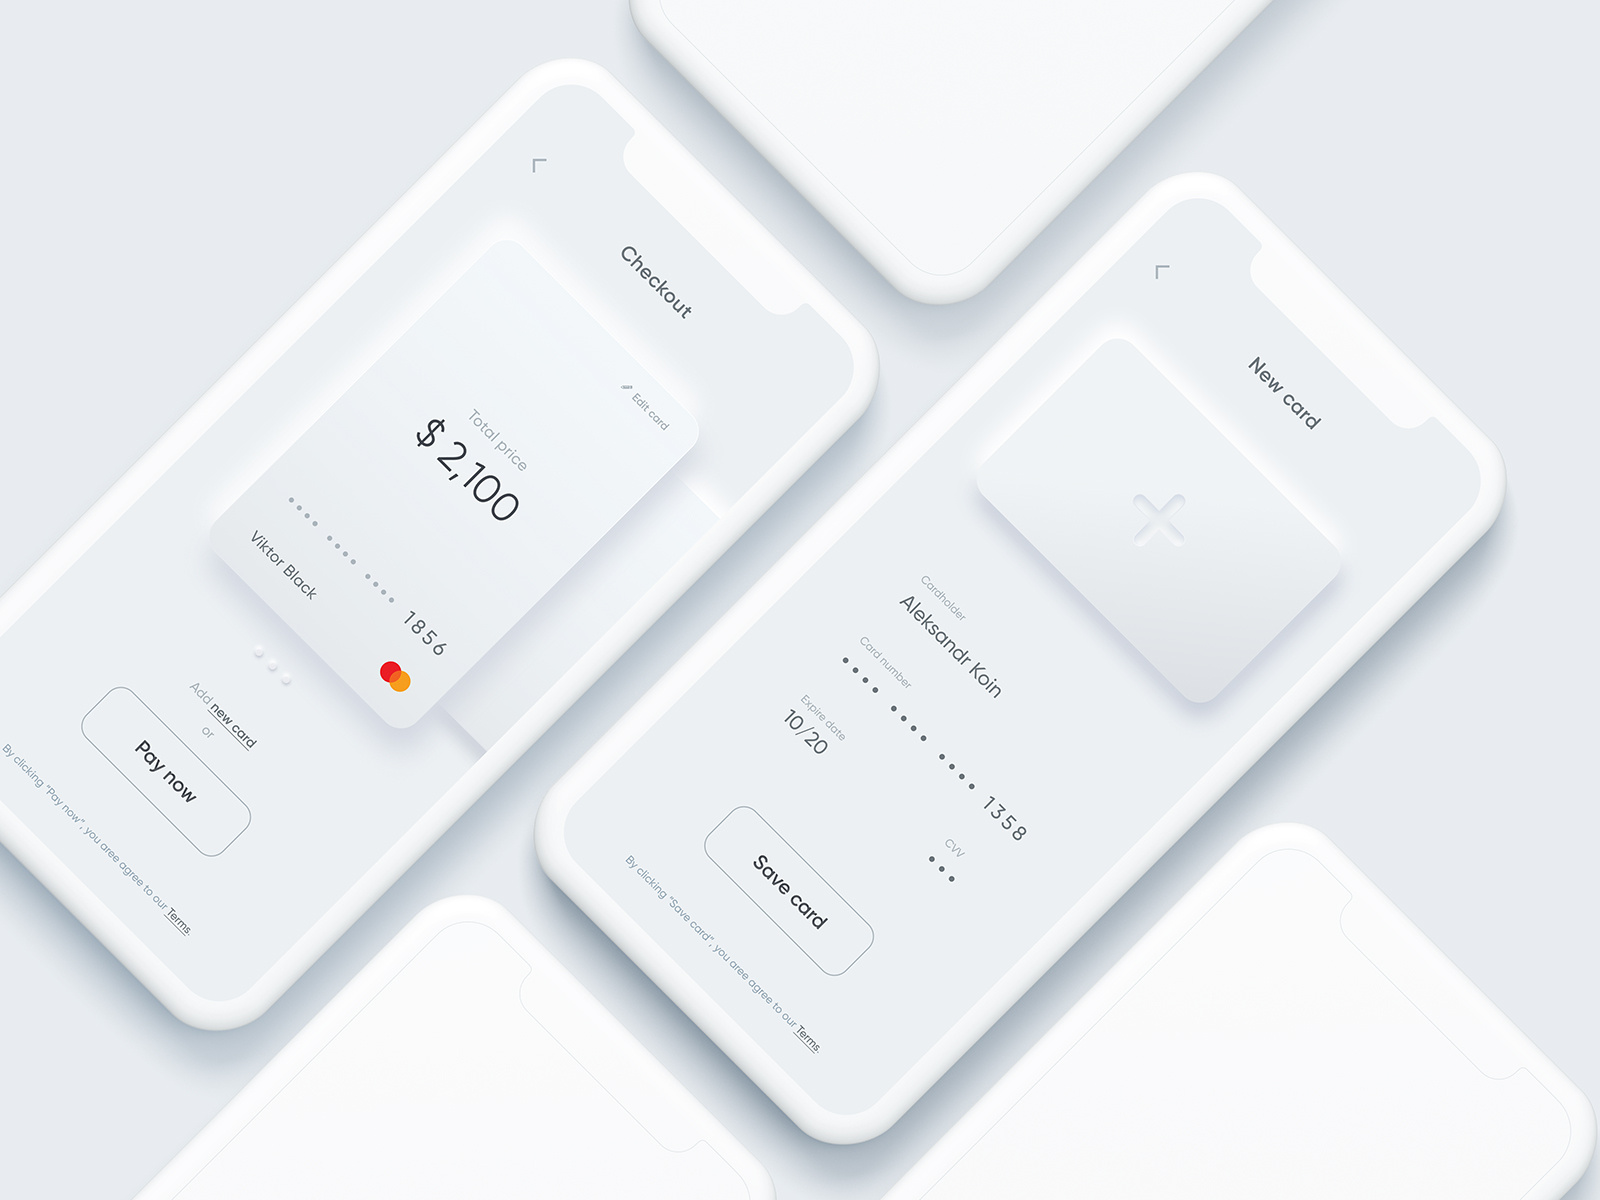
Neumorphism
Neumorphism is a popular trend that UI designers follow in 2022. It is all about solid colours, subtle contrast and accessible design. Designers use multiple shadows and background colour values to create a floating effect. It adds 3D feels for the buttons and visual freshness to the whole digital product.
Simplification and minimalism
Making things simpler with a pleasant appearance arouses positive emotions. It’s all about highlighting the main content and allowing the design to play a supporting role.

WRAP UP
Following the above steps and practises will help you to design an amazing product. Remember that during the whole process you should think about the customers, their expectations and habits.
Build your app with top mobile developers
FAQ
How do I start the UX design process for my mobile app?
Begin the UX design process by conducting thorough user research to understand your target audience’s needs and preferences. This involves creating detailed user personas and mapping out user journeys to visualize the steps users take when interacting with your app. It ensures your design decisions are grounded in real user needs.
What are the key elements of effective UI design?
Effective UI design should prioritize simplicity, ensuring that the app’s interface is intuitive and easy to navigate. Consistency in design elements like colours, fonts, and button styles helps users learn the app’s interface faster. Always aim for a design that aligns with user expectations to create a seamless and enjoyable user experience – and, of course, your brand.
Can you give an example of a good practice in UX design?
A good practice in UX design is to focus on solving real problems for your users. This means identifying pain points in their current experiences and designing your app to address these issues effectively. Simplifying complex tasks into easy-to-navigate steps greatly enhances user satisfaction and engagement with your app.
How often should usability testing be conducted?
Usability testing should be an iterative part of the development process. Start testing early with prototypes to identify usability issues before they become embedded in the design. Continue testing throughout development and after launch to refine the user experience based on actual user interactions and feedback.
What’s the best way to gather feedback for UX/UI improvements?
Combining quantitative methods like surveys and analytics with qualitative methods such as user interviews and usability testing offers a comprehensive view of user feedback. This approach allows you to measure user satisfaction and identify specific areas of the app that may need improvement from both a broad and detailed perspective. Always remember, that the app should be created with the users in mind, so tests on real users are crucial.
Read more
50 Examples of great React Native apps in 2021
MVP vs Prototype – which one to choose for idea validation?
How React Native can cut your development cost